By Evan Sangaline | December 29, 2017
Browser automation frameworks–like Puppeteer, Selenium, Marionette, and Nightmare.js–strive to provide rich APIs for configuring and interacting with web browsers.
These generally work quite well, but you’re inevitably going to end up running into API limitations if you do a lot of testing or web scraping.
You might find yourself wanting to conceal the fact that you’re using a headless browser, extract image resources from a web page, set the seed for Math.random(), or mock the browser’s geolocation before running your test suite.
Your specific automation framework might provide a built-in way to accomplish some of these, but they all have their limitations.
One option for adding custom behavior is to implement the new functionality natively to your browser automation framework and to submit a pull request. This is a great thing to do if you think that others will find it useful, but you often need a solution immediately and there’s no guarantee that your pull requests won’t languish for months. In these situations, or ones where your use case is quite niche, you’ll probably find yourself turning to JavaScript. Regardless of whether you’re using Python, Ruby, Java, or some other language, virtually all browser automation frameworks and browsers support some form of JavaScript injection. This often provides the quickest and easiest way to add custom behavior or configuration while web scraping or writing tests.
There’s just one problem: not all JavaScript injection methods behave in the some way. Some execute your JavaScript code before the page is parsed by the browser while others wait until after the DOMContentLoaded or load events have fired. The latter behavior can be very problematic in situations where it’s important that your code executes before any JavaScript included on a page. For instance, your geolocation mock isn’t going to do a lot of good if it’s injected after your webapp has already checked the location!
This means that it’s important to know not just how to inject JavaScript into pages, but also when that JavaScript will execute. In this article, we’ll develop a simple test to measure when injected JavaScript code executes and then we’ll comprehensively benchmark the various injection methods and how they behave. If you’re interested in running custom JavaScript code with Puppeteer, Selenium, Marionette, or other frameworks, then this guide should tell you everything you need to know.
The Test Page
To help measure the injection behavior, I put together a simple test page that I could use to benchmark the different methods. The test page–which deliberately loads very slowly–will render something that looks like this
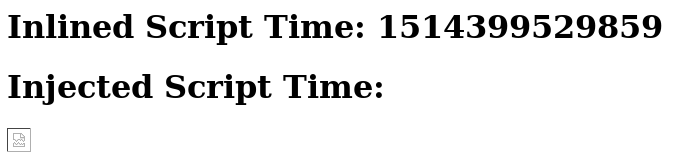
based on the following HTML code.
<html>
  <head>
    <script type="text/javascript">
      ((time) => {
        document.addEventListener('DOMContentLoaded', () => {
          document.getElementById('inlined-time').innerHTML = time;
        });
      })(Date.now());
    </script>
    <script src="https://httpbin.org/delay/5"></script>
    <link rel="stylesheet" href="https://httpbin.org/delay/5">
  </head>
  <body>
    <h1>Inlined Script Time: <span id="inlined-time"></span></h1>
    <h1>Injected Script Time: <span id="injected-time"></span></h1>
    <img src="https://httpbin.org/delay/5"></img>
  </body>
</html>
There are a few things to pay attention to here.
First, you’ll notice that there’s a script tag immediately inside of the document head which immediately populates the time variable with the time in milliseconds since the Unix epoch.
This time corresponds to the earliest possible moment that a page’s own scripts could possibly execute.
The inlined script then waits until the DOM has completely loaded, finds the span with an id of inlined-time, and populates it with the time when the script initially executed so that we can read it easily on the test page.
We will later do something similar with the injected-time span when we inject JavaScript in order to compare the execution times.
The other important thing going on here is that there is an external script, a stylesheet, and an image in the document.
These all point to https://httpbin.org/delay/5, an endpoint that will wait for five seconds before responding (thanks to the awesome httpbin.org site!).
The response won’t correspond to a valid script, stylesheet, or image–that’s why there’s a broken img in the screenshot above–but browsers will wait for these resources in a realistic way.
We can see exactly how they’re loaded by recording the network activity in the Chrome Developer Tools.
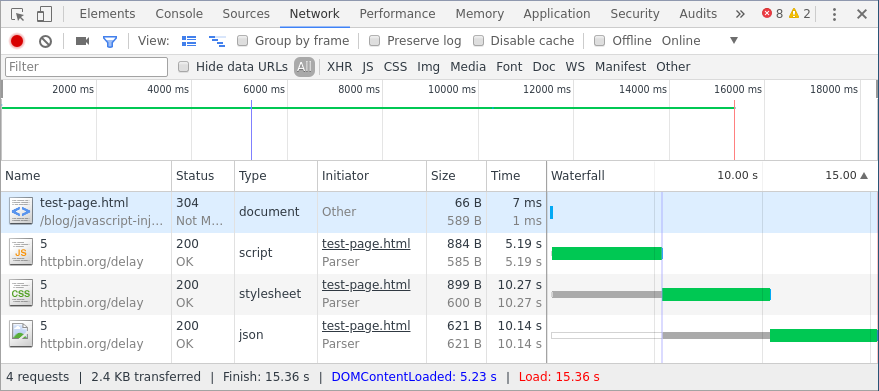
Each resource loads sequentially and the whole page takes about 15 seconds to load. The long delay time will make it very obvious if a browser automation framework is waiting for these resources before executing injected JavaScript.
The JavaScript Injection Methods
Now all that’s left to do is to try out the different approaches. These fall into two categories:
- Browser Automation Framework Methods - These are methods that are specific to various browser automation frameworks (e.g. Selenium, Puppeteer, Marionette).
- General Methods - These methods can be used with any browser automation framework. They tend to be a little more work and they also come with a few caveats in terms of browser support. They’re also way more interesting than just calling a function from a library!
You can skip around between these if you would like, but the Chrome and Firefox with Selenium section lays out some common concepts that will be helpful for understanding the other sections.
Browser Automation Framework Methods
Chrome and Firefox with Selenium
The standard way to inject JavaScript with Selenium is to use the execute_async_script() method. I put together a simple Python script called selenium-execute-async-script.py that’s designed to facilitate the benchmarking of this method. It’s contents are as follows.
import os

from selenium import webdriver


# The JavaScript that we want to inject.
# This updates the second `span` with the execution time of the script.
# `arguments[0]` is how Selenium passes in the callback for `execute_async_script()`.
injected_javascript = (
    'const time = Date.now();'
    'const callback = arguments[0];'
    'const handleDocumentLoaded = () => {'
    '  document.getElementById("injected-time").innerHTML = time;'
    '  callback();'
    '};'
    'if (document.readyState === "loading") {'
    '  document.addEventListener("DOMContentLoaded", handleDocumentLoaded);'
    '} else {'
    '  handleDocumentLoaded();'
    '}'
)


# Loop through the four different configurations.
for browser in ['chrome', 'firefox']:
    for mode in ['headless', 'graphical']:
        # Set up the driver with the appropriate settings.
        if browser == 'chrome':
            options = webdriver.ChromeOptions()
            if mode == 'headless':
                options.add_argument('headless')
            driver = webdriver.Chrome(chrome_options=options)
        elif browser == 'firefox':
            if mode == 'headless':
                os.environ['MOZ_HEADLESS'] = '1'
            elif mode == 'graphical':
                os.environ.pop('MOZ_HEADLESS', None)
            driver = webdriver.Firefox()

        # Navigate to the test page and inject the JavaScript.
        driver.get('https://intoli.com/blog/javascript-injection/test-page.html')
        driver.execute_async_script(injected_javascript)

        # Save the results as an image.
        os.makedirs('img', exist_ok=True)
        filename = os.path.join('img',
            f'selenium-execute-async-script-{browser}-{mode}-results.png')
        driver.get_screenshot_as_file(filename)
        print(f'Saved "{filename}".')

        # Cleanup the driver before the next test.
        driver.quit()
Towards the top of the script, you can see that I defined an injected_javacript variable that contains JavaScript code as a string.
The contents of this script are very similiar to those in the script tag in our test page; both are designed to record the initial script execution time and then populate the appropriate span with that time.
The inlined script, however, was certain to execute before the DOMContentLoaded event while we aren’t sure ahead of time when our injected JavaScript will execute.
It could be either before or after the DOMContentLoaded event that lets us know that our span is ready to be populated.
To handle both scenarios, we explicitly check document.readyState and then either update the span immediately or wait until DOMContentLoaded, as appropriate.
One other component of the JavaScript to notice is that we’re assigning arguments[0] to a variable called callback and then calling it after we update the span.
What happens when we use execute_async_script() is that our code snippet is wrapped in a function and then this function is called with a callback as the argument.
Even though we don’t see the function signature in our code, we can access the callback using the arguments object.
Calling this function lets Selenium know that our asynchronous code has finished running.
The rest of the Python code is then relatively simple; it loops through the four combinations of Chrome/Firefox and graphical/headless, visits the test page, and then saves a screenshot as an image. Note that we probably wouldn’t expect the graphical and headless results to differ much for a given browser. However, it is conceivable that some methods won’t support both modes. I’ll try to include results for both, just to make it obvious what modes are supported. I also won’t cover the headless configuration code in much detail here, but you can check out our guides to running Selenium with headless Chrome and with headless Firefox to learn more. Those guides also cover installing Selenium, Chrome, Firefox, and the appropriate drivers.
Finally, we can run our script with python selenium-execute-async-script.py.
This should output something along the lines of the following.
Saved "img/selenium-execute-async-script-chrome-headless-results.png".
Saved "img/selenium-execute-async-script-chrome-graphical-results.png".
Saved "img/selenium-execute-async-script-firefox-headless-results.png".
Saved "img/selenium-execute-async-script-firefox-graphical-results.png".
Each of these files contains a screenshot of the test page that was taken after the injected JavaScript finished executing. They look pretty similar to the screenshot that we looked at before, only now the second time is filled in.
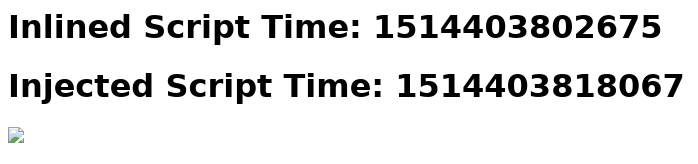
What we really care about here is the relative time between the execution of the inlined and injected scripts. We can calculate the injection delay by subtracting the time that the injected script ran from the time that the inlined script ran. If the difference is negative then it means that the injected script executed first.
Taking a look at the injection delays for each of the configurations reveals that they’re all in the ballpark of 15 seconds.
| Browser | Mode | Injection Delay (ms) |
|---|---|---|
| Chrome | Graphical | 15352 |
| Chrome | Headless | 15392 |
| Firefox | Graphical | 15596 |
| Firefox | Headless | 15540 |
You’ll remember that we had added three external resources to our test page that would each take about 5 seconds to load: a script, a stylesheet, and an image.
The fact that we’re seeing a 15 second delay before our injected JavaScript executes means that Selenium’s execute_async_script() is waiting for all of these resources to load before executing the JavaScript.
More precisely, the driver.get() call synchronously blocks until all of these resources are loaded and we can’t call execute_async_script() before then.
This is a major inconvenience of working with Selenium and one of the reasons why other projects have been growing in popularity recently.
We’ll take a look at a couple of workarounds for Selenium later on in the General Methods section, but first let’s take a look at some of these other frameworks.
Firefox with Marionette
If you’re only interested in automating Firefox, then Marionette is a relatively solid choice.
The Marionette protocol is built into Firefox for remote interaction, and it’s actually how geckodriver communicates with Firefox when you use Selenium.
Loosely speaking, this means that what is possible to do with Marionette is a superset of what is possible to do with geckodriver and Selenium.
There are both JavaScript and Python Marionette clients, but the Python one is far better documented so we’ll use that one here. Doing so will also allow us to reuse some of the code from our Selenium benchmark. One major downside of the Python client is that it’s only available as a Python 2 library… but it’s easy enough to set up a Python 2 virtual environment and install it.
# Set up a Python 2 virtualenv.
virtualenv -p /usr/bin/python2 env/
. env/bin/activate
# Note that the package isn't called `marionette`.
pip install marionette_driver
The method for injecting JavaScript in Marionette is called execute_async_script() and it works in much the same way as the Selenium function of the same name. This means that our new marionette-execute-async-script.py script will be quite similar to the one that we used in the previous section.
import os
import time

from marionette_driver.marionette import Marionette


# The JavaScript that we want to inject.
# `arguments[0]` is how Selenium passes in the callback for `execute_async_script()`.
injected_javascript = (
    'const time = Date.now();'
    'const callback = arguments[0];'
    'const handleDocumentLoaded = () => {'
    '  document.getElementById("injected-time").innerHTML = time;'
    '  callback();'
    '};'
    'if (document.readyState === "loading") {'
    '  document.addEventListener("DOMContentLoaded", handleDocumentLoaded);'
    '} else {'
    '  handleDocumentLoaded();'
    '}'
)

# The location of the Firefox binary, will depend on system.
# Be careful to use the actual binary and not a wrapper script.
binary = '/usr/lib/firefox/firefox'

# Loop through the four different configurations.
for mode in ['headless', 'graphical']:
    # Set up the client with the appropriate settings.
    if mode == 'headless':
        os.environ['MOZ_HEADLESS'] = '1'
    else:
        os.environ.pop('MOZ_HEADLESS', None)
    client = Marionette('localhost', bin=binary, port=2828)
    client.start_session()


    # Navigate to the test page and inject the JavaScript.
    client.navigate('https://intoli.com/blog/javascript-injection/test-page.html')
    client.execute_async_script(injected_javascript)

    # Save the results as an image.
    filename = os.path.join('img',
        'marionette-execute-async-scripy-firefox-%s-results.png' % mode)
    with open(filename, 'wb') as f:
        f.write(client.screenshot(format='binary'))
    print 'Saved "%s".' % filename

    # Cleanup the client before the next test.
    client.cleanup()
In fact, both the injected_javascript and the headless configuration are completely identical between the two scripts.
We now have to specify the Firefox binary location and the port to Marionette, which we didn’t with Selenium, but that’s really the only significant difference in the code.
Unfortunately, the results are also quite similar.
| Browser | Mode | Injection Delay (ms) |
|---|---|---|
| Firefox | Graphical | 15453 |
| Firefox | Headless | 15530 |
We see the telltale 15 second delay which reveals that our injected script isn’t being executed until all three of our slow external resources have loaded. You can inject JavaScript with Marionette, but it’s not a workaround for executing your code earlier than you can with Selenium.
Chrome with Puppeteer
The Chrome DevTools protocol defines a remote interaction mechanism for Google Chrome and Chromium which is analogous to Marionette for Firefox. It provides fine-tuned control of Chrome which extends far beyond what is possible with Selenium. That said, many people prefer to use Puppeteer instead of a DevTools protocol client. Puppeteer, an official Google Chrome project, is built on top of a DevTools protocol client, but additionally provides a more pleasant JavaScript API than the underlying protocol.
Assuming that you already have npm installed on your machine, you can install Puppeteer in the usual way.
npm install -g puppeteer
The method that we’ll use to inject our JavaScript with Puppeteer is Page.evaluateOnNewDocument(). The documentation is actually pretty clear about when code that’s injected with this method executes:
The function is invoked after the document was created but before any of its scripts were run.
Let’s go ahead and test this anyway, both to verify the behavior and to demonstrate the usage of Page.evaluateOnNewDocument().
You can download the script from puppeteer-evaluate-on-new-document.js or check out the contents here.
const puppeteer = require('puppeteer');

const runTest = async (mode) => {
  const browser = await puppeteer.launch({
    args: ['--no-sandbox'],
    headless: mode === 'headless',
  });
  const page = await browser.newPage();
  await page.evaluateOnNewDocument(() => {
    const time = Date.now();
    const handleDocumentLoaded = () => {
      document.getElementById("injected-time").innerHTML = time;
    };
    if (document.readyState === "loading") {
      document.addEventListener("DOMContentLoaded", handleDocumentLoaded);
    } else {
      handleDocumentLoaded();
    }
  });
  await page.goto('https://intoli.com/blog/javascript-injection/test-page.html');
  const filename = `img/puppeteer-evaluate-on-new-document-chrome-${mode}.png`;
  await page.screenshot({ path: filename });
  console.log(`Saved "${filename}".`);

  await browser.close();
};

(async () => {
  await runTest('headless');
  await runTest('graphical');
})();
The syntax obviously looks quite different from our previous Python scripts, but the logic has a few significant differences as well.
Notably, we’re calling Page.evaluateOnNewDocument() before we navigate to our test page.
In our previous examples, we were bottlenecked by waiting for the page navigation methods to return before we could inject our JavaScript.
It doesn’t really matter how long the page.goto() promise takes to resolve in this case because Puppeteer already knows what JavaScript to inject.
Another thing to notice is that we’re injecting raw JavaScript instead of a string. The easy interoperation between the browser and control code is one of the nice things about using a browser automation framework written in JavaScript. It’s not a huge deal either way, but it does eliminate some context switching and makes serialization/marshalling easier to deal with.
Anyway, running our script with node puppeteer-evaluate-on-new-document.js produces the following results.
| Browser | Mode | Injection Delay (ms) |
|---|---|---|
| Chrome | Graphical | -6 |
| Chrome | Headless | -8 |
Remember that the negative injection delay means that our code is being evaluated before our inlined script tag in the header. This is the ideal situation because it means that we can be certain that any modifications to the JavaScript environment occur before any page code is executed. You can always attach event listeners at this stage to wait for page load events–like we did in the injected script–if you have code that needs to wait for the DOM to be ready or any other conditions.
General Methods
Chrome and Firefox with a Custom WebExtension
Writing a custom WebExtension is one of my favorite ways to add functionality to a browser during automation. There’s a little bit of a learning curve if you haven’t written one before, but the extension API is extremely powerful. It’s also quite nice that extensions are pretty much cross-browser compatible out of the box these days. The one major downside is that headless Chrome still doesn’t support WebExtensions. If that’s not a requirement for you, then a custom extension offers a level of customizability that even the best browser automation frameworks can’t compete with.
Let’s start on this one by making an extension directory that we’ll put two files inside of.
The first should be called manifest.json and have the following contents.
{
  "manifest_version": 2,
  "name": "JavaScript Injection Test Extension",
  "version": "1.0.0",
  "applications": {
    "gecko": {
      "id": "javascript-injection@intoli.com"
    }
  },
  "content_scripts": [
    {
      "matches": ["*://*/*"],
      "js": ["injected-javascript.js"],
      "run_at": "document_start"
    }
  ]
}
This is mostly the minimal boilerplate required to define an extension with the exception of the content_scripts section.
This tells the browser to inject a file called injected-javascript.js on every page load that matches *://*/* (i.e. every page load).
The run_at parameter being set to document_start specifies that the script should be injected as soon as possible.
Now we just need to create the injected-javascript.js file. It’s contents will be pretty much the same as all the other JavaScript that we’ve been injecting.
((time) => {
  const handleDocumentLoaded = () => {
    document.getElementById("injected-time").innerHTML = time;
  };
  if (document.readyState === "loading") {
    document.addEventListener("DOMContentLoaded", handleDocumentLoaded);
  } else {
    handleDocumentLoaded();
  }
})(Date.now());
These two files give us a fully functional extension, but we’ll still need to automate the browser in order to install it, navigate to pages, take screenshots, etc.
We can reuse much of the logic from our earlier Selenium script for this and adapt it to install the extension instead of calling execute_async_script().
This is really easy with Chrome; all we need to do is add a --load-extension=extension flag.
Firefox is a little more tricky because it doesn’t have a similar flag and Selenium has only partial support for the now-standard WebExtensions format.
There’s a big fat hack at the top of this selenium-custom-web-extension.py script because of that.
I recommend checking out Using Firefox WebExtensions with Selenium if you would like to learn more about what that part is doing.
from selenium import webdriver
from selenium.webdriver.firefox.firefox_profile import AddonFormatError


# This must be the developer edition to use an unsigned extension.
firefox_binary = '/usr/bin/firefox-developer-edition'
extension_directory = 'extension'


# Patch in support for WebExtensions in Firefox.
# See: https://intoli.com/blog/firefox-extensions-with-selenium/
class FirefoxProfileWithWebExtensionSupport(webdriver.FirefoxProfile):
    def _addon_details(self, addon_path):
        try:
            return super()._addon_details(addon_path)
        except AddonFormatError:
            try:
                with open(os.path.join(addon_path, 'manifest.json'), 'r') as f:
                    manifest = json.load(f)
                    return {
                        'id': manifest['applications']['gecko']['id'],
                        'version': manifest['version'],
                        'name': manifest['name'],
                        'unpack': False,
                    }
            except (IOError, KeyError) as e:
                raise AddonFormatError(str(e), sys.exc_info()[2])
webdriver.FirefoxProfile = FirefoxProfileWithWebExtensionSupport


# Loop through the four different configurations.
for browser in ['chrome', 'firefox']:
    for mode in ['headless', 'graphical']:
        # Set up the driver with the appropriate settings.
        if browser == 'chrome':
            options = webdriver.ChromeOptions()
            if mode == 'headless':
                options.add_argument('headless')
            options.add_argument(f'load-extension={extension_directory}')
            driver = webdriver.Chrome(chrome_options=options)
        elif browser == 'firefox':
            if mode == 'headless':
                os.environ['MOZ_HEADLESS'] = '1'
            elif mode == 'graphical':
                os.environ.pop('MOZ_HEADLESS', None)
            profile = webdriver.FirefoxProfile()
            profile.add_extension(extension_directory)
            driver = webdriver.Firefox(profile, firefox_binary=firefox_binary)

        # Navigate to the test page and let the extension do its thing.
        driver.get('https://intoli.com/blog/javascript-injection/test-page.html')

        # Save the results as an image.
        os.makedirs('img', exist_ok=True)
        filename = os.path.join('img',
            f'selenium-custom-web-extension-{browser}-{mode}-results.png')
        driver.get_screenshot_as_file(filename)
        print(f'Saved "{filename}".')

        # Cleanup the driver before the next test.
        driver.quit()
Outside of the extension loading, the rest of the script should look almost identical to our previous Selenium script. Running it produces the following results.
| Browser | Mode | Injection Delay (ms) |
|---|---|---|
| Chrome | Graphical | -1 |
| Chrome | Headless | N/A |
| Firefox | Graphical | -2 |
| Firefox | Headless | -2 |
There’s no result for headless Chrome because it doesn’t support extensions, but all of the other configurations successfully inject and execute the JavaScript before the inlined code executes.
Chrome and Firefox with mitmproxy
Another fun way to inject JavaScript is to use mitmproxy.
If you’re not familiar with it, mitmproxy is an SSL-capable intercepting proxy.
It allows you to intercept, modify, and otherwise have your way with any traffic that’s directing through the proxy.
The basic approach that we’ll take is to intercept HTML requests and inject a new script tag into the head before any other contents.
mitmproxy has a scripting API that you can use to implement custom behavior like this using Python.
Creating a file called mitm-injector.py with the following contents will accomplish our goal of injecting a custom script.
from bs4 import BeautifulSoup
from mitmproxy import ctx


# Load in the javascript to inject.
with open('extension/injected-javascript.js', 'r') as f:
    injected_javascript = f.read()

def response(flow):
    # Only process 200 responses of HTML content.
    if flow.response.headers['Content-Type'] != 'text/html':
        return
    if not flow.response.status_code == 200:
        return

    # Inject a script tag containing the JavaScript.
    html = BeautifulSoup(flow.response.text, 'lxml')
    container = html.head or html.body
    if container:
        script = html.new_tag('script', type='text/javascript')
        script.string = injected_javascript
        container.insert(0, script)
        flow.response.text = str(html)

        ctx.log.info('Successfully injected the `injected-javascript.js` script.')
You’ll first notice that we’re loading in the exact content script from our WebExtension: extension/injected-javascript.js.
Our response(flow) method then gets called for each request, but only does anything for successful HTML requests.
In that case, the document is parsed using Beautiful Soup, a script tag created and injected, and the response text overwritten with the new HTML code.
You could alternatively use a regular expression here to modify the opening head tag, but that can be less reliable than using a parser if odd formatting is encountered.
The non-interactive version of mitmproxy can be launched and configured to use our custom script by running the following.
mitmdump -p 8080 -s mitm-injector.py
This will start the proxy listening for connections on port 8080.
We’ll still need a way to launch and control the browsers, so we’ll again use a modified version of our original Selenium script.
This one is called selenium-mitmproxy.py and the only real modification is to configure the browsers to use the local proxy that we just set up.
This can be done in Firefox by specifying Firefox network preferences in the profile.
In Chrome, we can just use the --proxy command-line argument.
import os

from selenium import webdriver


# The proxy settings.
proxy_host = 'localhost'
proxy_port = 8080

# Loop through the four different configurations.
for browser in ['chrome']:
    for mode in ['headless']:
        # Set up the driver with the appropriate settings.
        if browser == 'chrome':
            # Enable headless mode.
            options = webdriver.ChromeOptions()
            if mode == 'headless':
                options.add_argument('--headless')

            # Specify the proxy.
            options.add_argument('--proxy-server=%s:%s' % (proxy_host, proxy_port))

            # Launch Chrome.
            driver = webdriver.Chrome(chrome_options=options)

        elif browser == 'firefox':
            # Enable headless mode.
            if mode == 'headless':
                os.environ['MOZ_HEADLESS'] = '1'
            elif mode == 'graphical':
                os.environ.pop('MOZ_HEADLESS', None)

            firefox_profile = webdriver.FirefoxProfile()
            # Specify to use manual proxy configuration.
            firefox_profile.set_preference('network.proxy.type', 1)
            # Set the host/port.
            firefox_profile.set_preference('network.proxy.http', proxy_host)
            firefox_profile.set_preference('network.proxy.https_port', proxy_port)
            firefox_profile.set_preference('network.proxy.ssl', proxy_host)
            firefox_profile.set_preference('network.proxy.ssl_port', proxy_port)

            # Launch Firefox.
            driver = webdriver.Firefox(firefox_profile=firefox_profile)

        # Navigate to the test page and inject the JavaScript.
        driver.get('https://intoli.com/blog/javascript-injection/test-page.html')

        # Save the results as an image.
        os.makedirs('img', exist_ok=True)
        filename = os.path.join('img',
            f'selenium-mitmproxy-{browser}-{mode}-results.png')
        driver.get_screenshot_as_file(filename)
        print(f'Saved "{filename}".')

        # Cleanup the driver before the next test.
        driver.quit()
The mitmdump process will spit out a lot of logging information while this script runs, including one notable error.
Proxy server listening at http://0.0.0.0:8080
127.0.0.1:38024: clientconnect
127.0.0.1:38024: CONNECT intoli.com:443
 << Cannot establish TLS with client (sni: intoli.com): TlsException("(104, 'ECONNRESET')",)
We see this because Chrome currently doesn’t support ignoring certificate errors in headless mode. This is going to change extremely soon–in Chrome 65 to be exact–but we won’t be able to intercept SSL traffic in Chrome headless until then. The rest of the configurations should work successfully though and produce results roughly comparable to the following.
| Browser | Mode | Injection Delay (ms) |
|---|---|---|
| Chrome | Graphical | -1 |
| Chrome | Headless | N/A |
| Firefox | Graphical | -1 |
| Firefox | Headless | -1 |
The results look great, but it’s definitely a little bit janky to modify the HTML of the pages like this. I would generally try to avoid this approach if one of the other methods works for you.
Conclusion
Whatever your JavaScript injection needs, I hope that you were able to find some useful information here!
Even if you don’t use one of the frameworks that we investigated, the WebExtension and mitmproxy should work with a variety of different automation frameworks.
If you have any interesting approaches of your own then we would love to hear about them in the comments.
As always, please feel free to get in touch with us here at Intoli. Our team has broad expertise in web scraping and data intelligence, and we would really love to hear about what you’re working on. We also have a pretty awesome monthly newsletter where we send out our favorite articles every month!
Suggested Articles
If you enjoyed this article, then you might also enjoy these related ones.

Performing Efficient Broad Crawls with the AOPIC Algorithm
Learn how to estimate page importance and allocate bandwidth during a broad crawl.
Breaking Out of the Chrome/WebExtension Sandbox
A short guide to breaking out of the WebExtension content script sandbox.

User-Agents — Generating random user agents using Google Analytics and CircleCI
A free dataset and JavaScript library for generating random user agents that are always current.
Comments